Hiển thị các bài đăng có nhãn knot. Hiển thị tất cả bài đăng

Thứ Ba, 8 tháng 11, 2011

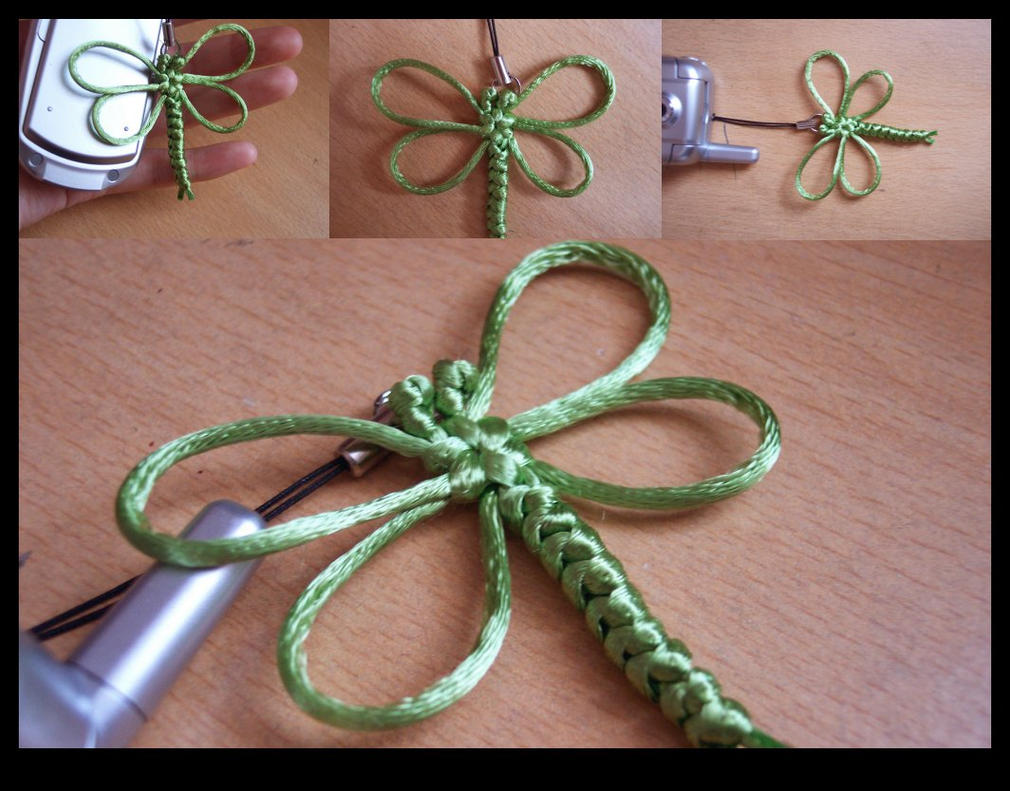
Macrame dragonfly tutorial

http://th05.deviantart.net/fs11/PRE/i/2006/207/8/9/Dragonfly_knot_by_MrJin.jpg

Tutorial: Chinese Knot Dragonflies


macrame dragonfly tutorial
1. Double the cord to make two equal lengths
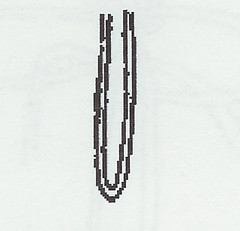

2. Let the ends fall as shown leaving the center loop be the length of the dragon fly that you are making. This is the length of the body. Here is where you can add beads for eyes. They go on at the top of the “M”
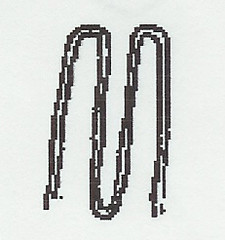

3. Bring the right leg over and under as shown.
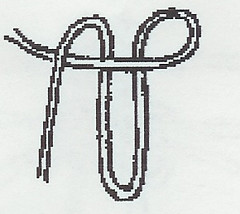

4. Bring the left leg behind the body and through the loop as shown.
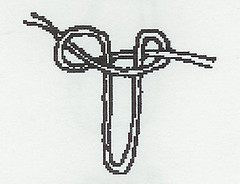

5. This repeats step 3 in the reverse direction
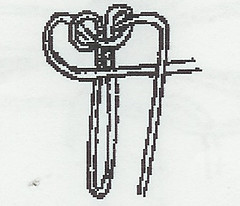

6. This repeats step 4 in the reverse direction. A complete square knot is formed. You may choose to do one or two complete square knots to form the head of the dragonfly.
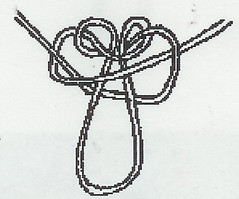

7. The first wing pair is formed as in step three. Allow enough length to produce proper wing to body proportion.
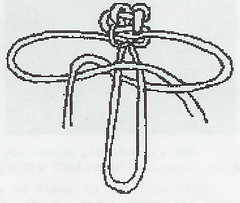

8. Complete the square knot as in step 4. Take care in tightening the knot to allow the wing lengths to stay equal. Tighten carefully and slide the knot up the body loop to the desired position.
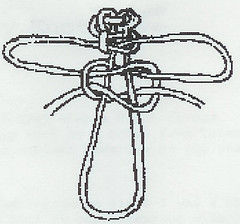

9. Add a second wing set as in step 7 and step 8. Tighten the second wing set and move to position. The body is then completed by square knotting as in steps 3 through 6 above, down the length of the body loop.
10. Tighten carefully as you go. Ending can be completed by trimming loose ends and applying a dot of glue to secure.
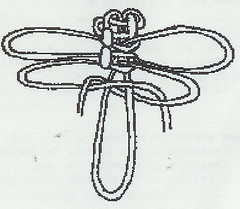

and the finished dragonfly:
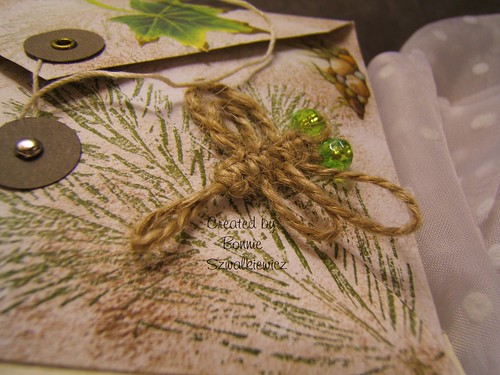
2009-01-14 010

 Read more: http://craftiblog.wordpress.com/2006/04/22/macrame-dragonfly-1/

Thứ Hai, 10 tháng 10, 2011

Crafty jewelry: Hurricane Bracelets tutorial


Crafty jewelry: Hurricane Bracelets tutorial


In an attempt to grab hold of the last moments of summer, and to kill time while stuck indoors during the hurricane this weekend, my friends and I got together to make old school bracelets. Once we got started it was like riding a bike, and each only took about an hour. I am a fan of rocking a them with a bright watch, or mixing one with a wrist of mixed metal. 
 
Supplies: Gimp, or Lester lace as we called in back in the day, from Blick Art (less then $2 a roll), scissors, and a fastener. Steps after the break...
 
Cut two piece, each as long as your wingspan.
Start by threading the black strand through the fastener loop, and move it to the middle of the strand.
 
Wrap around the front and back of your finger.
 
Take your orange string under both black loops, and put till you reach the middle of your orange strand
 
 Next take the right end of the orange and go over and under in the front, and then take the left end and go over and under in the back. 
Pull slowly to create a square knot
 
Next loop your orange pieces over the square knot diagonally
 
Thread the right end of the black through the orange hoop in the back, Thread the left black end through the orange hoop in the front. 
 
It should look like this as you pull the four pieces 
Repeat and the pattern should like this
 
When your bracelet is long enough to fit around your waist, tie all four pieces in a knot at the end. Then thread one strand through the other end of the fastener
 
Tie the ends in another knot and trim ends.  
 

Thứ Bảy, 1 tháng 10, 2011

Macrame belt tutorial


You will need threads or yarn and a buckle of some kind, in this example, I've used
two metal rings. You can also leave a bit of yarn in the beginning and the end, so
you can tie the belt instead of locking it .

Prepare two thread bunches with four threads in each.


Make square knots on the middle of buth of them.


Put one of the threads through both of the rings and fold the square knots you've made in half as in the picture above. Make a pair of square knots so its secured on the rings. Do the same thing with the other thread bunch.


The two bunches should now be split in four. Divide them so you get four threads in each bunch.


Make square knots of the four bunches. 5 on the outer and 3 on the inner.


Make a shared square knot with the four threads in the center.


Split them up again and make three more square knots.


Now put the threads together in two groups again. Take the four middlest threads in each group (a) and tie a square knot of these (b). Do the same to both sides.


Repeat steps 5 to 8 until you've got a belt in proper length. You might have add strings as you tie. Finish the belt with a overhand knot and leave a fringe at the end (see the first image in the tutorial).
Macrame belt tutorial

Thứ Hai, 19 tháng 9, 2011

Easy crafts for kids: Friendship Bracelet Tutorial


Lasting Friendship Bracelet Tutorial

At some point in time, a reversal of roles between mothers and daughters happen. My mother used to take me to places when I was young. Now I take her to places. It took sometime before this happened but the reversal of roles between me and Princess One occurred after 9 years - sooner than anticipated. The reversal of roles I'm referring to is her being my mentor in this crafting project. I let her walk me through all the steps to create this Lasting Friendship Bracelet tutorial, which I'm also sharing with you. I love naming projects and so this is called operation Lasting Friendship Bracelet tutorial.

Photobucket

Materials needed:
Beads with large openings
Hemp cord
Tape (painter's tape is used in this case)
Cardboard

Photobucket

You'll need the cardboard to make a loom. Cut any cardboard into a strip about 3 inches wide and 11 inches long. Cut two slits on both ends approximately half an inch away from each other.


Photobucket

Measure your wrist.

Photobucket

Whatever the size is, add 12 inches then cut 2 strips of hemp cord with this length. For example, Princess One's wrist is 7 inches in diameter so by adding 12 inches, we have a total length of 19 inches. Cut two 19-inch strips of the hemp cord.

Photobucket

Insert the hemp cords on the slits of the loom, making sure that approximately 6 inches of the cord are left hanging.

Photobucket

Tape these cords at the back of the loom to look like this. They are named Cord 1 and Cord 2.

Photobucket

Cut another hemp cord, called Cord 3, with a length double of Cord 1. Since in this case Cord 1 is 19 inches, Cord 3 should be 38 inches. Tie the end of Cord 3 to Cord 1 with a simple knot, leaving a tail of about 6 inches, then tucking its tail on the slit for Cord 1.

Photobucket

Pass through Cord 3 under Cord 1 and Cord 2, then insert a bead.

Photobucket

Make sure that the bead stays in the middle of Cord 1 and Cord 2.

Photobucket

Pass Cord 3 over Cord 2 going towards the bead, then insert it in the bead. By now, Cord 3 should be on the left side and the bead is snug.

Photobucket

To add the next bead, pass Cord 3 under Cord 1 and Cord 2 towards the right like the step did with the green bead.

Photobucket

After that, you're ready for your next bead.

Photobucket

Here's a little pictorial summary of the steps done earlier.

Photobucket

Photobucket

When you have reached the desired length, close the bracelet by tying the ends in a knot.

Photobucket

Make a clasp using another bead that you can easily slide up and down to close or loosen the bracelet.

Photobucket

Knot all the ends of the hemp cord and now you have a Lasting Friendship bracelet.

Photobucket

These are the bracelets we made together. It took us around 20 minutes to complete these beauties and it's so worth it!

Photobucket

How about you? Has there been a project where your kid led you to finish it?

Labels

Accessories Adult English afghan Amigurumi amirugumi Ảnh Art Art + Design Ẩm thực baby crochet baby knitting Baby learn bag Bags balloons Bé học toán Bé tô màu Bead belts books booties bows boxes bracelet cake candles candy Cards carving carving fruit carving fruits Cắm hoa Cắt may Chơi mà học clay coloring Coloring - Tô màu crafts crochet crochet pattern cross stitch Curtain cutting paper Dolls drawing Drawing - Vẽ dress Đan len Đất nặn cho bé earring Easy dot Embroidery Embroidery - Thêu fashion Felt Floral arrangements - Cắm và bó hoa flower arrangement flowers crochet Folding paper Folding towels food food decor Funny garden Gấp giấy Gấp hộp Giầy - Dép gift Gifts glass gloves Hair hair clip hat hats holiday craft holiday crafts home and garden jewelery jewelry Kết hạt Khăn - Mũ kirigami knitting knitting pattern knot Lam do choi Làm đẹp Làm đồ chơi Làm hoa vải Làm thiệp Learning english macrame Magazine make up making flower making flowers Making flowers - Làm hoa Making toys Mẫu móc Mẫu móc hoa mittens Móc Móc đường riềm nail Nail art necklace necklaces Nến trang trí Nghệ thuật Nghệ thuật cắt giấy Nhà đẹp or Origami Origrami painting Painting - Sơn màu Paiting - Sơn màu Paper Patchwork Phông nền làm ảnh pictures pillow Pillows plastic Play and learn for baby poncho Quilling paper Quilt recycle recycling repair work ribbon ring rings rugs Sách tiếng anh cho bé scarves sewing shawls shoes and sandals skirt skirts slippers soap socks sweater tablecloths Tatting Tết dây Thêu Thiệp Thủ thuật Thư giãn Tin học Văn phòng Toán Trang điểm Trang trí Truyện tranh Túi xinh Tutorial Tutorial video underwear Valentine's day Video Video dạy móc video tutorial weaving wedding wood