Hiển thị các bài đăng có nhãn cutting paper. Hiển thị tất cả bài đăng

Thứ Ba, 20 tháng 12, 2011

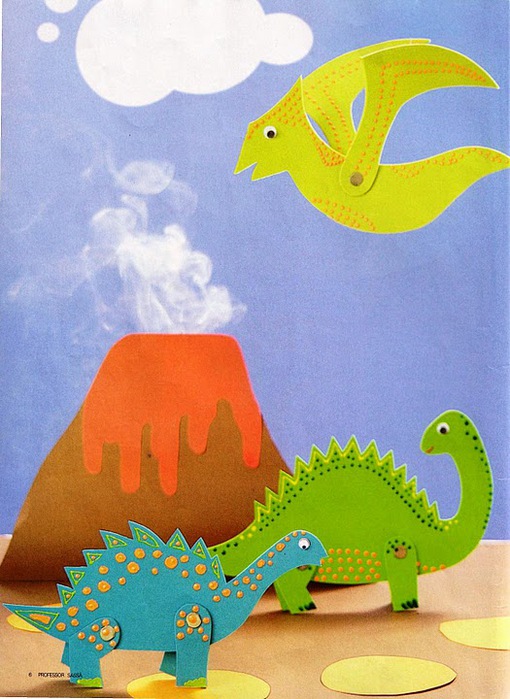
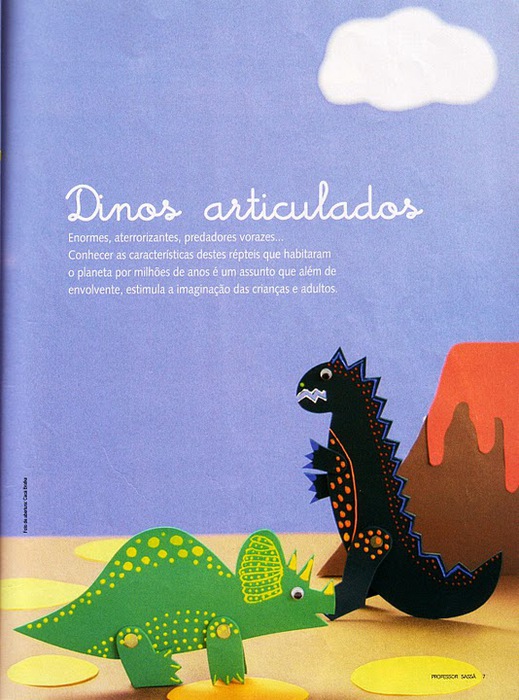
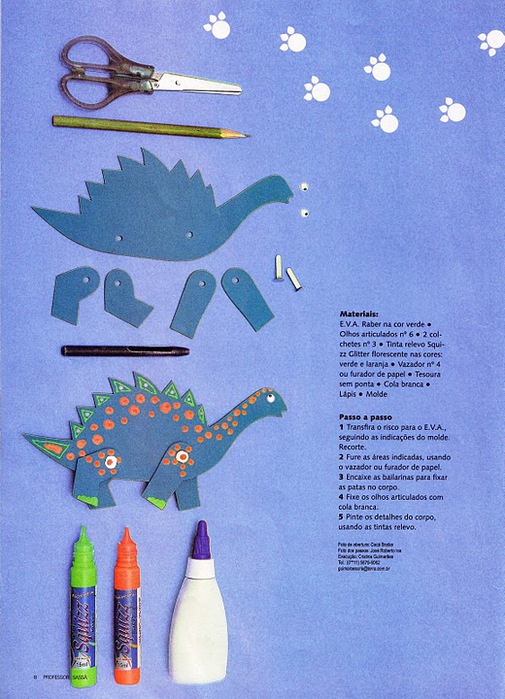
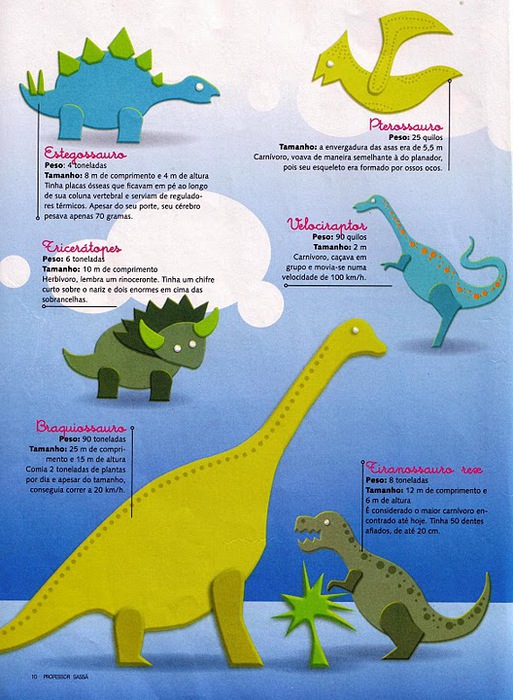
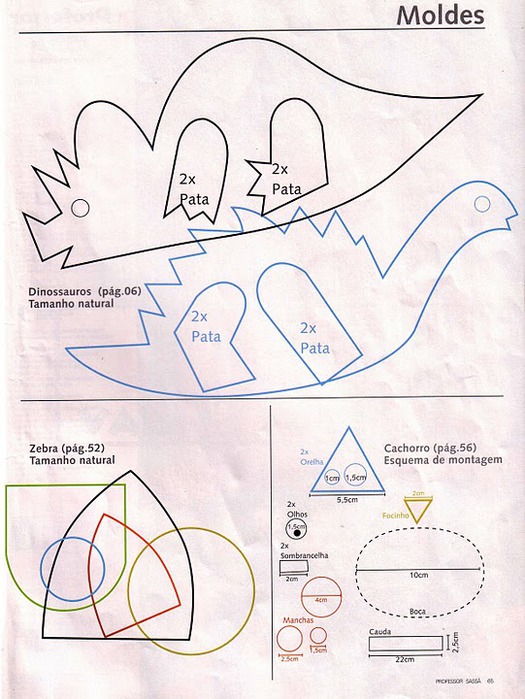
Dragon, Dinosaurs paper craft for kids

Dragon paper craft for kids

ATIVIDADES-INFANTIS-REINO-ANIMAL (19) (510x700, 123Kb)


ATIVIDADES-INFANTIS-REINO-ANIMAL (20) (519x700, 128Kb)


ATIVIDADES-INFANTIS-REINO-ANIMAL (21) (505x700, 141Kb)


ATIVIDADES-INFANTIS-REINO-ANIMAL (22) (513x700, 135Kb)


ATIVIDADES-INFANTIS-REINO-ANIMAL (17) (505x700, 100Kb)


ATIVIDADES-INFANTIS-REINO-ANIMAL (18) (525x700, 115Kb)

Thứ Tư, 24 tháng 8, 2011

Flower gift: Pencil Flower Posey tutorial


Pencil Flower Posey

Flower gift: Pencil Flower Posey tutorial

kids craft ideas

Pencil Flower Posey

Pencil_Flower_Posey4

Designer: Laurie Cinotto

Difficulty rating: Beginner
With a little bit of time and just a few supplies, you can make this easy and fun Pencil Flower Posey. It’s sure to brighten the day and the desk of your favorite teacher.
Below you’ll find five simple flower designs to try, using four different Fiskars craft punches. I encourage you to look in your tool box, grab a few of your favorite punches, do some experimenting, and try making some designs of your own. There’s so much variety in the world of flowers – let your imagination go wild and create all sorts of lovely blooms.
Pencil_Flower_Posey2
Start by selecting a few coordinating papers to work with. Text weight works better than a heavier card stock weight paper. Thinner paper allows you to use more petals in your bloom and it’s easier to manipulate.
The basic assembly for all the flowers is the same. Just punch out the petals and flower center, stick your pin through the flower center, through the ends of the petals and into the pencil eraser.
What will vary is the petal and center shapes, and the petal folding and manipulation techniques.
For this first bloom, use your Block Party squeeze punch to punch out eight petals. Also, punch one Scalloped Circle and three May Flowers for the flower center.
Pencil_Flower_Posey3
Turn you squares diagonally and fold the sides inward to create a “kite” shape.
Pencil_Flower_Posey4
Push your pin through three stacked May Flowers, the Scalloped circle, each of the eight petals, and into the side of the pencil eraser.
For this ruffled bloom, punch out five XL Circles and eight Scalloped Circles. Fold seven of your eight scalloped circles in half.
Pencil_Flower_Posey5
Fold a tiny pleat in each of your XL Circle petals to give them a little dimension.
Pencil_Flower_Posey6
To assemble, push your pin through the center of the flat Scalloped Circle, then through the tips of each folded Scalloped Circle, and finally through the pleats of the large Circles. Stick the pin into the top of the eraser and fold the tips of the folded Scalloped Circles forward.
This next design is an easy one. Just punch out seven Circles and one Scalloped Circle. Fold each Circle in half, and crease. Push your pin through the center of the Scalloped Circle and through the tip of each folded Circle. Finally, push the pin into the side of the eraser.
Pencil_Flower_Posey7
To create this fourth boom, punch out eight Circles and five May Flowers. Fold your Circles in half and use your thumbnail to make a sharp crease in ONLY the bottom third of your half circle. Run the pin through the center of your May Flowers and the creased end of each petal. Insert the pin into the side of the eraser.
Pencil_Flower_Posey8
For the fifth bloom, punch six Circles and one May Flower. Fold a large pleat in the center of each Circle. Stick the pin through the center of your May Flower and through the pleat of each petal, and into the top of the pencil eraser.
Pencil_Flower_Posey9
Once you’ve created all of your flowers, decorate a clean, empty soup can with coordinating paper to use as your “vase”.
Pencil_Flower_Posey10
Arrange the Pencil Flowers in the vase and share it with your favorite teacher.
Pencil_Flower_Posey11

Source: fiskars.com

Thứ Năm, 18 tháng 8, 2011

Art punches: Kirigami art, craft ideas

A likeness
http://www.emmavanleest.com/home/wp-content/uploads/2010/10/vanleest_alikeness.jpg
Art punches: Kirigami art, craft ideas
A gradual passing
http://www.emmavanleest.com/home/wp-content/uploads/2010/10/a-gradual-passing.jpg
Attainment
http://www.emmavanleest.com/home/wp-content/uploads/2010/10/attainment-2.jpg
The thief
http://www.emmavanleest.com/home/wp-content/uploads/2010/10/vanleest_thethief.jpg
Kayon – exterior
http://www.emmavanleest.com/home/wp-content/uploads/2010/10/vanleest_kayonexterior.jpg
Something lost
http://www.emmavanleest.com/home/wp-content/uploads/2010/10/Something-lost1.jpg
One after the other
http://www.emmavanleest.com/home/wp-content/uploads/2010/10/vanleest_oneaftertheother.jpg
St George
http://www.emmavanleest.com/home/wp-content/uploads/2010/10/St-George1.jpg
All matter that exists
http://www.emmavanleest.com/home/wp-content/uploads/2010/10/vanleest_allmatterthatexists-sm.jpg
Within
http://www.emmavanleest.com/home/wp-content/uploads/2010/10/Within1.jpg
Terroir

http://www.emmavanleest.com/home/wp-content/uploads/2010/10/IMG_5621-sm1.jpg
Beginning always
http://www.emmavanleest.com/home/wp-content/uploads/2010/10/IMG_5625under1mb1.jpg
Feint
http://www.emmavanleest.com/home/wp-content/uploads/2010/10/IMG_5626under1mb.jpg
Perpetua
http://www.emmavanleest.com/home/wp-content/uploads/2010/10/vanleest_perpetua1.jpg
To distant shrines
http://www.emmavanleest.com/home/wp-content/uploads/2010/10/vanleest_to-distant-shrines-under-1mb.jpg
As to a nest III
http://www.emmavanleest.com/home/wp-content/uploads/2010/10/vanleest_astoanest-3.jpg

emmavanleest.com/home/?attachment_id=6

Printable activities for preschoolers, Paper toys: kids craft ideas

 Printable activities for preschoolers, Paper toys: kids craft ideas

Thứ Tư, 17 tháng 8, 2011

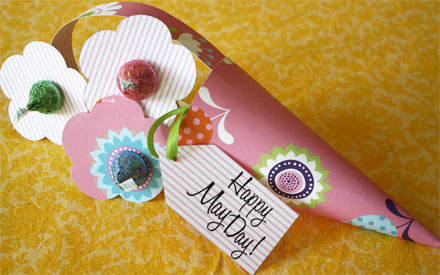
Gift presents: Printable May Day Basket, kids craft ideas

May Day is one of my favorite holidays to celebrate!  We love leaving unexpected treats on our friend’s door!
This printable May Day Basket with matching flowers is quick and easy to put together. In no time at all you will have a darling May Day Basket. In case flowers are not blooming in your area I have included a template to make some paper ones!
Get ready to celebrate May Day and show your friends how special you think they are!

 Gift presents: Printable May Day Basket, kids craft ideas

Supplies For Making a Paper May Day Basket

  • two-sided heavy (card-stock weight) scrapbooking paper cut to 8 1/2″ X 11″

  • wrapped candy for the flower centers

  • double sided tape or a glue stick

  • scissors

  • long craft sticks found at a craft and hobby store

  • a small piece of ribbon or string for attaching the tag

How to assemble A May Day Basket

Download template and print on two sided card-stock. Print with no scaling.

Printable May Day Basket

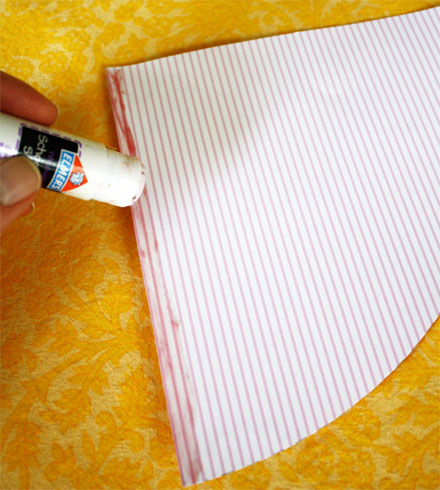
Cut out all pieces. Cut clear to the edge even though the lines don’t print clear to the edge. Spread glue stick on 1/4 inch on edge of straight side. Fold paper together to make a cone. Overlap top edge no more than 1/2 inch. Seam can go to a point. Glue flower shapes to wood craft stick and then glue candy to center of flower. Glue or tape handle to cone, fill cone with some candy and add flowers. Gift tag can be attached by poking a hole in the tag and attaching a ribbon. Let your imagination run wild. The flowers would be extra cute with some paper embellishments or even glitter! How about adding some leaves to the wood craft stick— you could even write some sweet messages on the leaves.
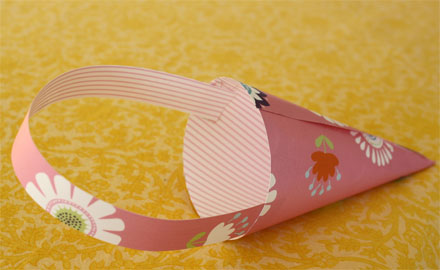
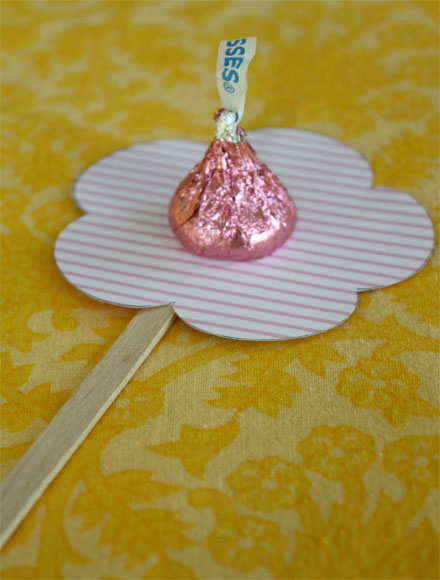
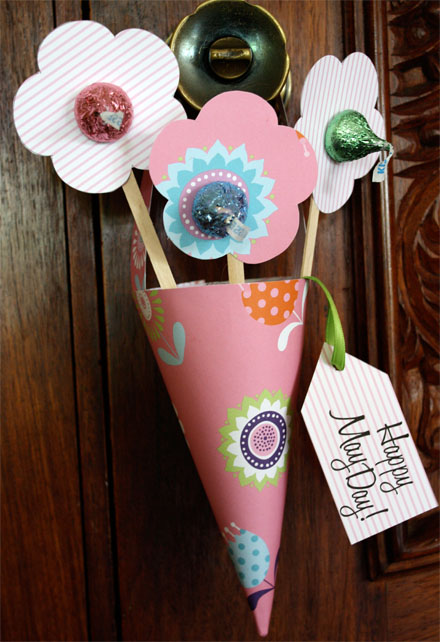
Hang on your friend’s door and RUN!
Source:skiptomylou.org

Tissue paper flower: kirigami sakura tutorial, kids craft ideas


Tissue paper flower: kirigami sakura tutorial, kids craft ideas
As mentioned a couple of days ago, Kirigami is the japanese art of paper cutting.
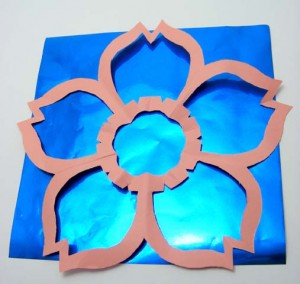
Here are instructions to make a simple sakura (japanese cherry blossom).


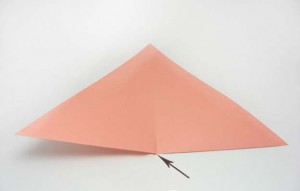
1 – Begin with a square piece of paper and fold diagonally to create a triangle.
Now, fold one bottom corner to the other and crease approximately 2cm to create a point of reference in the middle.
2 – Next, fold the bottom corners to the middle and crease approximately 2 cm.
* You should now have three evenly spaced creased along the bottom of the triangle.
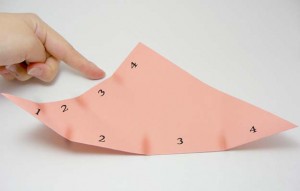
3 – Take the left corner and fold it up to the top point (crease 2 cm) and unfold.
Now, take the same corner and fold it to the newly created middle crease.
Repeat the last step, using the top point of the triangle and folding it to the new middle crease.
* You should now see four even sections along the bottom and left-hand side
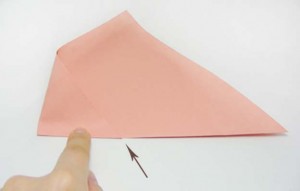
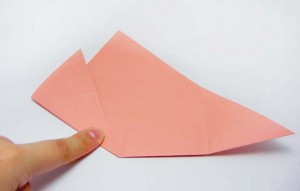
4 – Using the creases on the left-hand side, take the left bottom corner and fold it up to the top crease
(the fold should not surpass the bottom middle crease).
This time, press down along the entire fold to keep it in place.
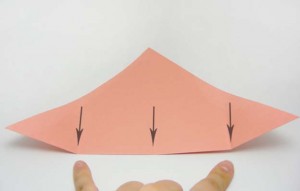
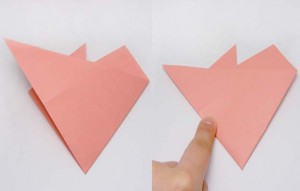
5 – Next, take the right bottom corner and fold it to the left-hand side. Make sure it’s folded along the edge, also, not surpassing the middle crease (this should give you a clean point at the bottom).
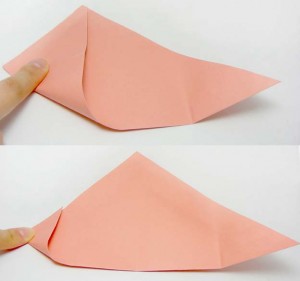
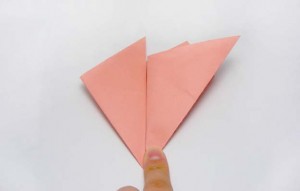
6 – Taking the same corner from the previous step, fold it in half, taking the corner back to the right-hand side. Make sure the edges are parallel.
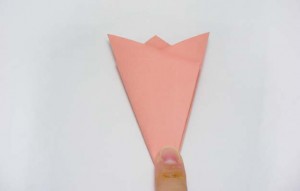
7 – Now, take the left side, fold over to the right, making sure to keep the edges parallel.
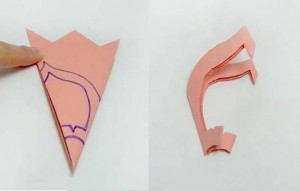
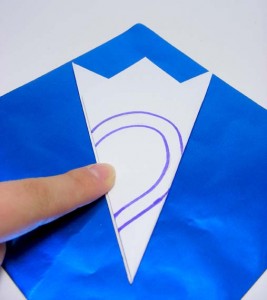
8 – Turn it over and draw a petal design. I chose a pointed petal design to create a sakura.
*Make sure to leave the left and right edges attached at some points in order to keep the entire image intact!
9 – Once the drawing is complete, cut it out and unfold it. You should have a lovely flower to decorate anything you like.
Try different styles to create a wide range of lovely designs.
This one I tried with a semi heart shape:
Once I cut it out, I thought it might look cheesy….
but to my surprise, it turned out different from what I imagined. The star in the middle adds a special touch.
Source:mihosuzuki.com

Labels

Accessories Adult English afghan Amigurumi amirugumi Ảnh Art Art + Design Ẩm thực baby crochet baby knitting Baby learn bag Bags balloons Bé học toán Bé tô màu Bead belts books booties bows boxes bracelet cake candles candy Cards carving carving fruit carving fruits Cắm hoa Cắt may Chơi mà học clay coloring Coloring - Tô màu crafts crochet crochet pattern cross stitch Curtain cutting paper Dolls drawing Drawing - Vẽ dress Đan len Đất nặn cho bé earring Easy dot Embroidery Embroidery - Thêu fashion Felt Floral arrangements - Cắm và bó hoa flower arrangement flowers crochet Folding paper Folding towels food food decor Funny garden Gấp giấy Gấp hộp Giầy - Dép gift Gifts glass gloves Hair hair clip hat hats holiday craft holiday crafts home and garden jewelery jewelry Kết hạt Khăn - Mũ kirigami knitting knitting pattern knot Lam do choi Làm đẹp Làm đồ chơi Làm hoa vải Làm thiệp Learning english macrame Magazine make up making flower making flowers Making flowers - Làm hoa Making toys Mẫu móc Mẫu móc hoa mittens Móc Móc đường riềm nail Nail art necklace necklaces Nến trang trí Nghệ thuật Nghệ thuật cắt giấy Nhà đẹp or Origami Origrami painting Painting - Sơn màu Paiting - Sơn màu Paper Patchwork Phông nền làm ảnh pictures pillow Pillows plastic Play and learn for baby poncho Quilling paper Quilt recycle recycling repair work ribbon ring rings rugs Sách tiếng anh cho bé scarves sewing shawls shoes and sandals skirt skirts slippers soap socks sweater tablecloths Tatting Tết dây Thêu Thiệp Thủ thuật Thư giãn Tin học Văn phòng Toán Trang điểm Trang trí Truyện tranh Túi xinh Tutorial Tutorial video underwear Valentine's day Video Video dạy móc video tutorial weaving wedding wood