Hiển thị các bài đăng có nhãn Gifts. Hiển thị tất cả bài đăng

Thứ Ba, 19 tháng 2, 2013

Móc hoa hồng tình yêu

_401_202 (422x336, 101Kb)
1. Crochet rose for love
_400_204 (448x300, 100Kb)
2. Crochet pattern
026_2_593 (449x610, 81Kb)
_401_202 (422x336, 101Kb)

Thứ Sáu, 14 tháng 10, 2011

Paper crafts for gifts: no-fuss paper roses


the easiest paper roses you’ll ever make!


Paper crafts for gifts: no-fuss paper roses
The ornamental design of paper doilies is what makes these roses so naturally exquisite.  Because the beauty is intrinsic in the material, these paper doily roses require little fuss to look beautiful.


1. Take an 8″ red paper doily and cut a straight line to the center.
2. Roll the doily, making sure the wrong side faces up.
3. Twist the end.
4. You may use floral tape to create a stem, but I used what I found at home — green painter’s tape.
5. Optional: you can cover the stem with ribbon for a more polished look.
There you have it — a paper rose in seconds!  These paper doily roses are not only simple to make, they are also very inexpensive.  I managed to pick up half a dozen red paper doilies for $1 at the dollar store.

A bouquet of these is certainly a stunning substitute for bows when wrapping gifts, but, with the help of some glue and magnets, I also fancy having a beautiful collection of paper roses on my fridge!

Thứ Năm, 13 tháng 10, 2011

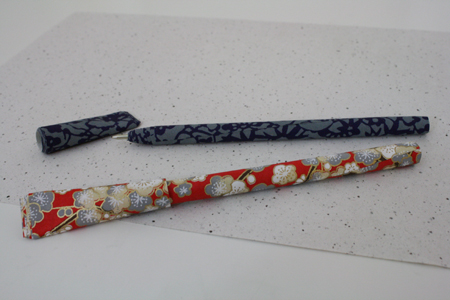
Unique crafts for gifts: paper pens tutorial

Unique crafts for gifts: paper pens tutorial


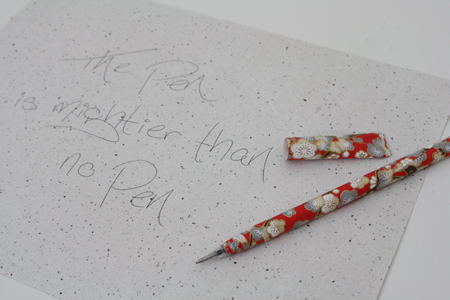
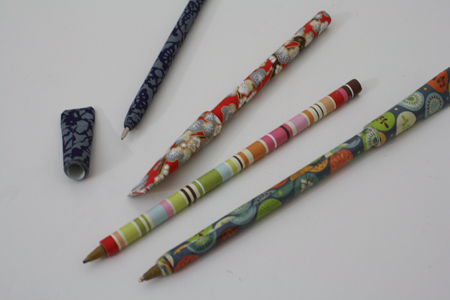
A few weeks ago I had a major “I could make that” moment when one of my coworkers handed me a pen. It was free pen she’d gotten from the campus copy store, and the entire body of the pen was paper. It was lightweight, had a wonderful feel to it, and looked pretty sweet.
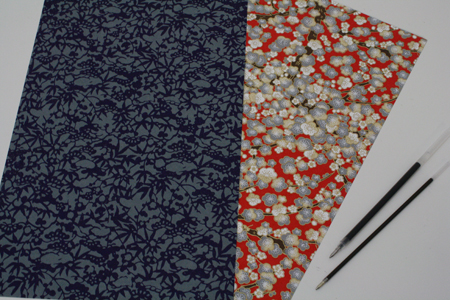
I stared at it and then said, “Hey, I could totally make one of these!”In addition to being practical, easy, fast and pretty, this is one of those often hard-to-find crafts that could actually serve as a perfectly guy-ish, useful, elegant and handmade item to give Dad on Father’s Day. Maybe not with the red floral pattern, but that blue one is reasonably manly, doncha think?
What you’ll need:
  • pens – the kind that can be taken completely apart with relative ease, and have a cartridge that’s pretty much just a straight stick shape – no fancy bits on the end
  • pretty paper - any reasonably lightweight kind. Japanese paper works really well for this, but any paper that’s about computer paper weight will work.
  • glue stick
  • white glue
  • scissors
  • paint brush
  • varnish
———————————————–
Putting it all together:
1) Take your pens apart and discard all the bits so you’re left with just the cartridge. As mentioned in the materials list above, you ideally want a pen cartridge that doesn’t has an even, smooth shaft with no funny bumps at the end (yes yes, haha, let’s all have a quick giggle after that little description). If the cartridge isn’t even all the way to the end, it will be harder to wrap the paper evenly around it.
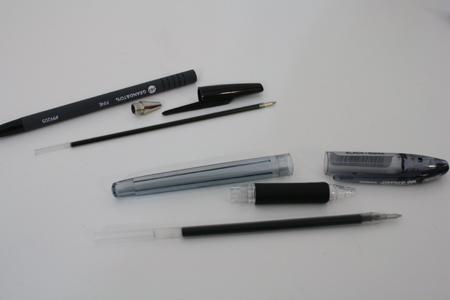
2) Take a piece of paper about 11″ long (so a standard size) and cut it so that it’s about 1/4 inch wider than your pen cartridge is long. Keep whatever scrap you cut off of one side – this will become the pen’s lid. As stated above, Japanese paper works brilliantly for this project. It is soft and flexible, adheres to itself very easily with the application of a little glue, and is easy to roll evenly. Scrapbooking paper and such will also definitely work, it’s just not quite as dreamily simple to roll smoothly around the pen cartridge. But the first time I tried this project I used scrapbooking paper, and it turned out fine.
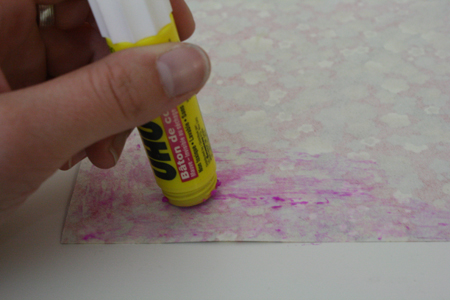
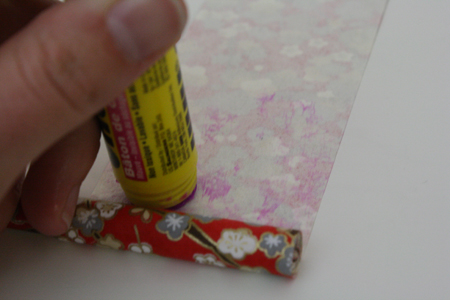
3) Lay your paper right side down and apply glue to its underside (which will be facing up). Keep going with the glue till about halfway up your sheet of paper. Be sure to get glue right up to the edges of the paper.

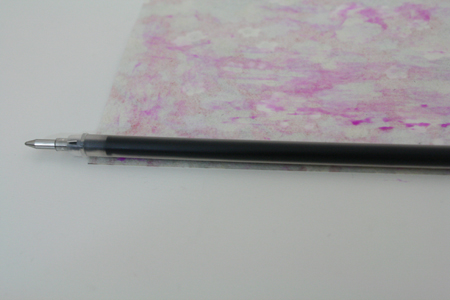
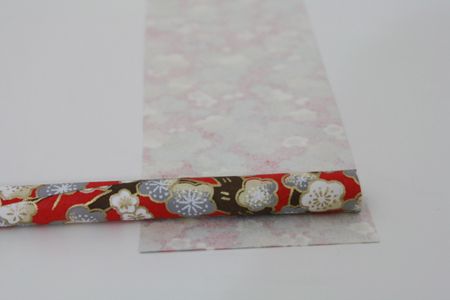
4) Lay the pen cartridge along it so that the writing end sticks out over the edge of the paper.


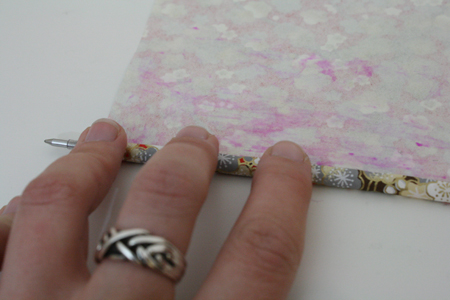
5) Roll the paper tightly around the cartridge, and keep rolling. When you reach the point where the glue stops, apply more and roll the pen around and around until you run out of paper.
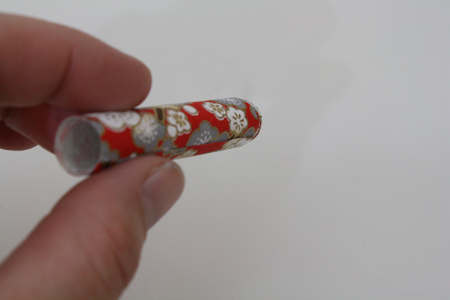
You can try to roll in a straight line, or you can deliberately go a bit crooked so that the writing end of your pen has a bit of a gradual point to it. I tried to roll the paper totally straight and just couldn’t make it happen, but in the end I liked the look of the uneven, gradual-point effect at the pen’s end.
Be sure to glue the final edge of the paper very thoroughly, and make sure it’s completely stuck down and smooth.
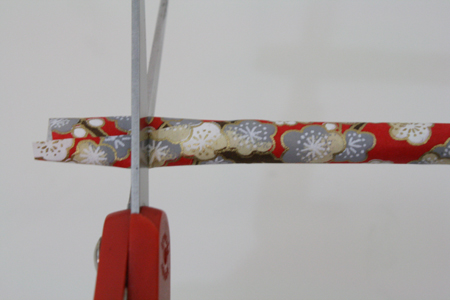
6) At the top end of the pen, cut off any excess paper so that the paper only goes about 1/8 to 1/4 inch above the end of the pen cartridge.

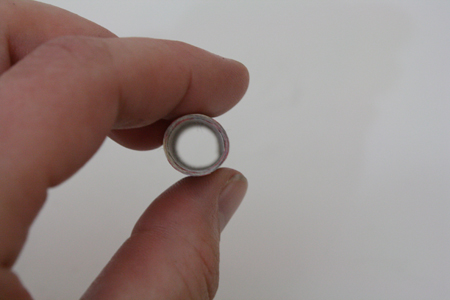
7)  Take the paper you set aside in step 2 to use as the lid, and lay it right side down. Place the upper (non writing) end of your pen on it.

8) Roll the paper once around the pen, keeping it just slightly loose. Then apply glue to the remaining, unrolled paper.

9) Continue rolling the paper, trying to keep the edges even, until it is all used up. Glue the final edge down well, and pull this rolled paper off of the pen. You should now have an open-ended tube that fits a bit loosely over your pen.

10) Apply some white glue to the inside edge of one end of your tube, then press down so that end of the tube flattens and sticks together. Hold until dry enough to stay in place on its own. Now your pen has a lid.
11) Now apply two or three coats of varnish to the pen and the lid. (This is why you wanted to keep that lid slightly loose – after a couple coats of varnish the pen should fit into it snugly, but without having to force it and wreck the paper.
12) Write something stunning.


Heart box: Free Gift Box Templates


To Download, Print, & Make

free gift box templates header
Make your own gift box in 5 minutes with one of my free gift box templates. Heart-shaped, cube-shaped, bag-shaped, and more.
Heart box: Free Gift Box Templates

This heart container looks really sweet and is great for Valentines Day, anniversaries, or other romantic occasions. Imagine filling it with Hershey Kisses and an "I ♥ You" note and giving it to your boyfriend / girlfriend. I bet they'd love it, and be really touched! (Hint to my other half, if he's reading this ;-)
Did I mention that this design is seriously easy to make? In fact, you don't even need any glue. It just slots together and holds in place by itself.


Materials

All you need is
  • A printer
  • Cardstock or paper
  • Scissors
This design turns out best when you make it from card stock. Paper works okay too, but it's a little bit floppy. If card stock doesn't fit in your printer, then you can print the template onto paper, and then trace it onto some card stock.


Download

Download my heart box template.
(Or click here for other templates and designs)
Open the file and print it onto your nice paper. If your paper is coloured on one side only, then make sure you print onto the blank side.

Read more at Homemade Gifts Made Easy

Thứ Ba, 11 tháng 10, 2011

Fall crafts: I Love Fall Printable


Fall crafts: I Love Fall Printable

Autumn is a month associated with thankfulness. So let me just take this moment and say I love my sisters so much and don't think I'll ever be able to express enough gratitude for everything they do for me. Whenever I need someone, I know that one of my sisters is only a phone call away. To make me laugh when I need it or give some amazing advice I never would have thought of. I really do have the most amazing family. Thank you! Love you guys!
 click here to download
amazing family

Thứ Ba, 4 tháng 10, 2011

Paper crafts: Chap Stick Pockets tutorial

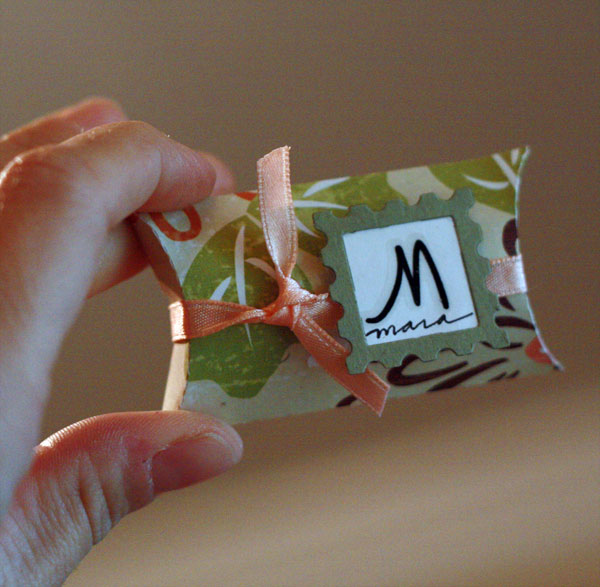
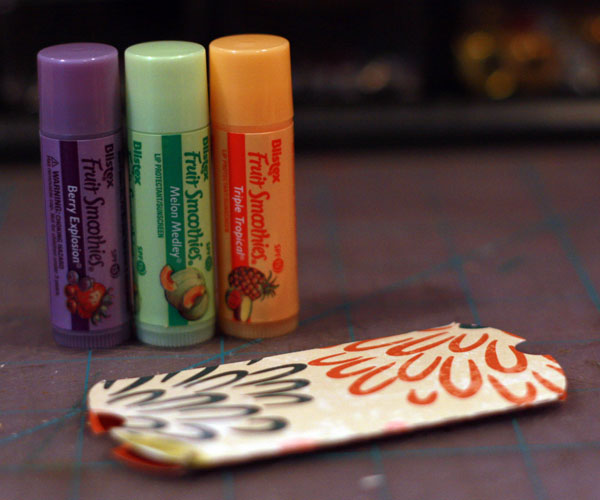
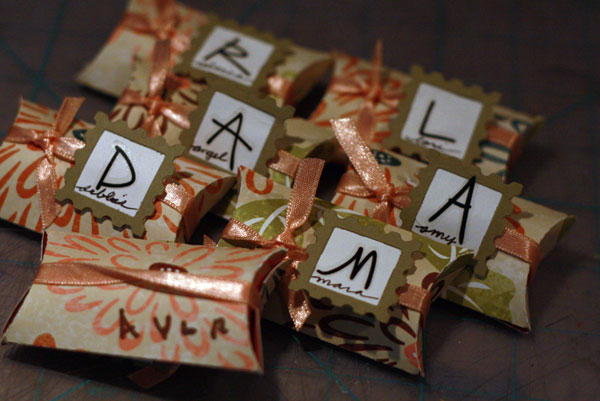
 One of the projects I made was a very simple paper pocket for a small tube of chap stick.  Take a look:
 Paper crafts: Chap Stick Pockets tutorial

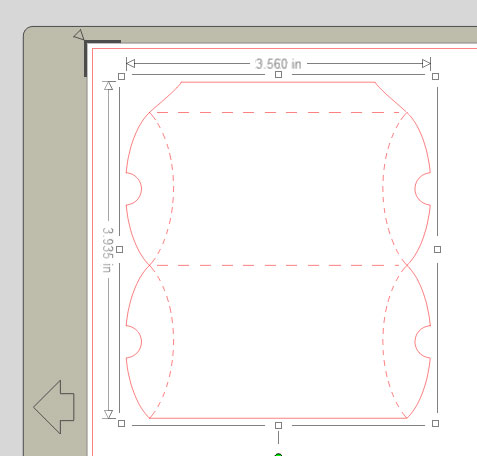
First I cut several pillow boxes with my Silhouette from some pretty patterned paper:
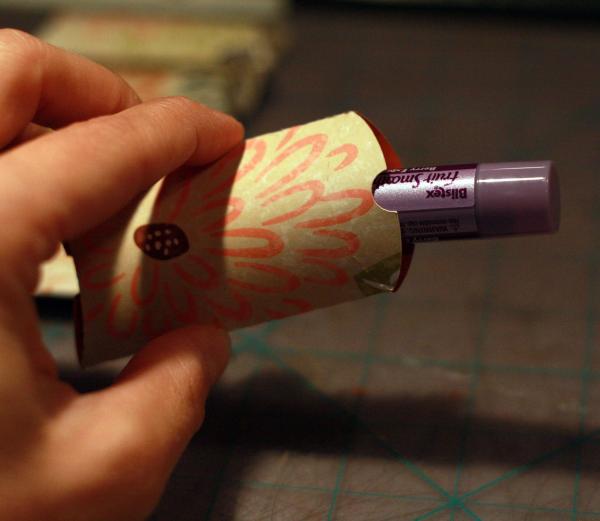
Then I inserted the chapstick and closed up the sides:
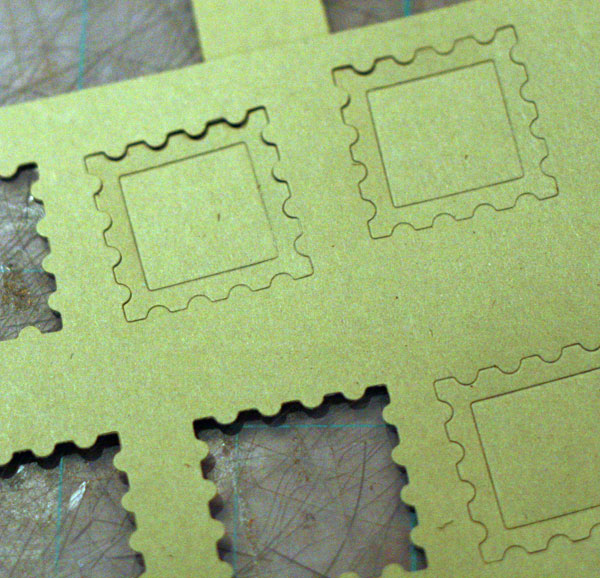
Made some quick labels with this postage stamp QuicKutz die cut and some alphabet stickers:
Then tied ribbon around each box and labeled it:
Easy peasy.  And cute. :)

Thứ Bảy, 1 tháng 10, 2011

Unique gifts: Fabric Fortune Cookies tutorial


Unique gifts:  Fabric Fortune Cookies tutorial

As promised - here's a fun tutorial that is great for any time of year and many occasions-including valentines day. Think of all the fun you could have with the notes or "fortune" inside - leave a love note, send to a friend, party favors, reveal you are pregnant, business thank you's or favors and the list could go on and on SO let's get started!!!


Fabric Fortune Cookies

supplies:
fabric
fusible fleece
fabric marker
scissors
wire
wire cutters
coordinating ribbon
craft glue
iron
paper word strips
circle pattern - approx. 4-5 inches in diameter

STEP 1: gather your fabric(s) - I always like to use an assortment of different colors and patterns


STEP 2: Using your iron and following the manufacturer's directions - apply the fusible fleece to the wrong side of your fabric using as large of a piece as you would like. (of fabric and fusible fleece depending on the number of circles you will be cutting out of that print)

STEP 3: Print off the circle template or create your own in any size you would like. (Simply click on the picture below, print or save and print)


STEP 4: Trace your pattern on the wrong side of your fused fabric using a fabric marker and cut out your circles. It's always a good idea when making several to fuse all your fabrics, trace and cut them all at once instead of doing each step individually.


STEP 5: Cut a piece of wire just slightly shorter than the width of your circle- You can use floral wire or I just like to use whatever I have on hand that will work. For this project I used some 22 gauge wire that I had handy. Leave a small margin of space on each end. Glue in place with Craft Glue, hot glue, E6000. Again, I used what I had on hand. I believe there are several type of glue that will work.


STEP 6: Cut a piece of coordinating ribbon - match the color of the inside. In this case mine is white - and glue it over the top of the wire. Let dry flat for 10 - 30 mins. Depending on what type of glue you used.


STEP 7: While your glue is drying print off your word strips on whatever color paper you would like. Have fun with the font, size and you could even print off several different phrases depending on what the occasion is. Cut your strips.

STEP 8: Once the glue is dry it's time to fold! Place your word strip in the middle of the "cookie" on top of the ribbon and fold the two ends up as shown in the photo.


STEP 9: Then fold the two ends down and toward the middle (bending the wire) to get the shape of the cookie


STEP 10: This is what I call the fluff and shape step. To help your fortune cookie have a natural "round" shape slip your finger in the middle and push out the sides, make sure there is a good "crease" down the middle like the photo below. This will help shape your cookie too.


STEP 11: You're done! Package them up however you would like and deliver! There are several creative ways to package these, design and give them so have fun! Enjoy!

Romantic Heart fabric for gifts and decor: sewing tutorial

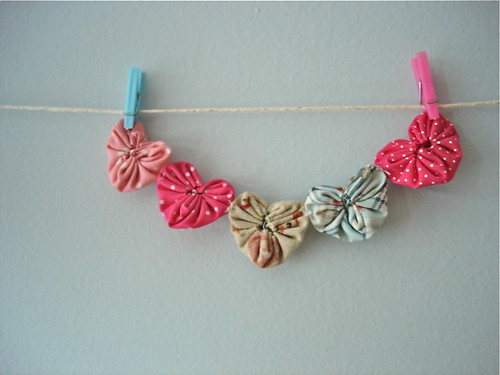
 Fuxico de coração frente
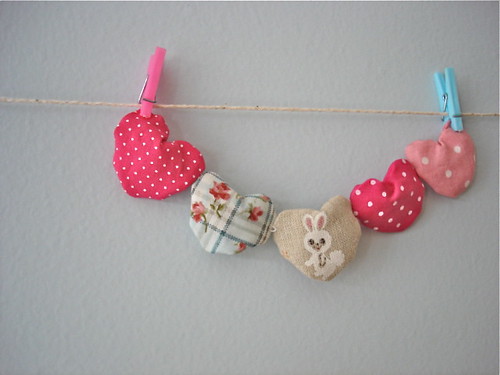
 Romantic Heart fabric for gifts and decor: sewing tutorial
DIY: gossip from the heart


I went back to show you how gossip heart-shaped mold using Clover super. This site has a tutorial on how to gossip in the race, but I like the practicality thought best to use atemplate ready, making my life. The mold is on sale in shops patchwork good, mine isPaulinia Shop (tel 11 3032-8799 / 3031-1039). But there is another legal option, which is win one of these here in Superziper. Read the end of the post to learn how:) The promotion was CLOSED


1. Separate the mold, retail fabric, needle, thread and small scissors.
2. The mold is composed of two parts the "base" and "cover". With it you will be able to do a gossip about 2, 0 cm. Get to work! Place the fabric on the part of the pattern down,as shown in photo.


3. Close the lid and pressing, leaving the fabric burnt to a crisp in the mold.
4. Go with scissors trimming the edges of the fabric, leaving 0.3 to 0.5 cm margin.


5. Give a "chop" with the scissors within the range that sits on top of the heart.
6. Thread the needle and tie a little knot at the tip. Starting the hole to the left of the mold base, pass the line from the inside out.


7. The little knot the end of the line is in, see?
8. Continue sewing the inside of the holes on the outside of the mold and counter-clockwise. Every point you will sew the edges of the fabric so that they are inside.


9. Attention in time to sew the base, bend the tip of the fabric as shown in photo 10


11. Notice that the last point will override the first point where you started sewing.
12. Carefully remove the fabric from the mold.


13. 're Almost there! Pull the thread carefully and go curling your gossip and adjustingthe format.
14. Give a tight little knot and cut the line left. If you want to decorate the center preach asmall bud, or let the natural beads!

Labels

Accessories Adult English afghan Amigurumi amirugumi Ảnh Art Art + Design Ẩm thực baby crochet baby knitting Baby learn bag Bags balloons Bé học toán Bé tô màu Bead belts books booties bows boxes bracelet cake candles candy Cards carving carving fruit carving fruits Cắm hoa Cắt may Chơi mà học clay coloring Coloring - Tô màu crafts crochet crochet pattern cross stitch Curtain cutting paper Dolls drawing Drawing - Vẽ dress Đan len Đất nặn cho bé earring Easy dot Embroidery Embroidery - Thêu fashion Felt Floral arrangements - Cắm và bó hoa flower arrangement flowers crochet Folding paper Folding towels food food decor Funny garden Gấp giấy Gấp hộp Giầy - Dép gift Gifts glass gloves Hair hair clip hat hats holiday craft holiday crafts home and garden jewelery jewelry Kết hạt Khăn - Mũ kirigami knitting knitting pattern knot Lam do choi Làm đẹp Làm đồ chơi Làm hoa vải Làm thiệp Learning english macrame Magazine make up making flower making flowers Making flowers - Làm hoa Making toys Mẫu móc Mẫu móc hoa mittens Móc Móc đường riềm nail Nail art necklace necklaces Nến trang trí Nghệ thuật Nghệ thuật cắt giấy Nhà đẹp or Origami Origrami painting Painting - Sơn màu Paiting - Sơn màu Paper Patchwork Phông nền làm ảnh pictures pillow Pillows plastic Play and learn for baby poncho Quilling paper Quilt recycle recycling repair work ribbon ring rings rugs Sách tiếng anh cho bé scarves sewing shawls shoes and sandals skirt skirts slippers soap socks sweater tablecloths Tatting Tết dây Thêu Thiệp Thủ thuật Thư giãn Tin học Văn phòng Toán Trang điểm Trang trí Truyện tranh Túi xinh Tutorial Tutorial video underwear Valentine's day Video Video dạy móc video tutorial weaving wedding wood